Monday, December 29, 2014

Christmas 2014

Just a quick post to describe what I baked this Christmas. I made my giveaway jars again (they must think I go through so much Moccona instant coffee - it's from work!) and this year I filled them with 3 different treats.

Gingerbread in holly and snowflake shapes. I made them last Halloween and you can find the recipe for it here.

Macarons - coffee with chocolate ganache, strawberry with strawberry cream cheese

Traditionally, Filipinos celebrate Christmas on Christmas Eve with a feast known as "Noche Buena" (literally means "good evening/night") where we eat, drink, optional karaoke is involved and everyone must wait till midnight to open their presents.
My Dad and I handing out everyone's gifts at midnight
(picture from my Dad's camera)
We gave Teddy his presents to open on Christmas morning. He was happy!

Monday, December 22, 2014

Blondies

When Katherine of A Cupcake or Two first told me about #foodiesecretsanta I was soooo eager to jump on board! What could be more exciting than creating a delicious treat to send to 3 other bloggers, and to receive 3 delicious treats from 3 more mystery bloggers! Sign me up for that please!

#foodiesecretsanta was started by Claire of Claire K Creations, and she made the culinary matches. I felt like a kid at Christmas time, eagerly checking my front door daily for my mystery gifts!

You can see the collection of everyone's #foodiesecretsanta recipes at Claire's website here!

Before I show you pictures of my yummy presents (which did not last long!), I'll show you my recipe.

BLONDIES
 Set a large bowl over a pot of simmering water and melt 1/2 a block of butter with 200g white chocolate.
Set aside to cool, then add 2 eggs and a scant cup of brown sugar.
TIP: Use dark brown sugar to achieve golden blondies, light brown for pale blondies

Fold in 3/4 cup plain flour and 1/4 cup self-raising flour (use more flour if the mix is too runny).
Fold in 1/2 cup sour cream, stirring until golden and caramelly.


 Finally, stir in 1/2 a bag of my FAVOURITE - NestlĂ© Caramel Baking Chips
(I ended up eating the other half of the bag!)
Spread to the edges of a lined brownie tin.
 Bake at 160 C until a skewer comes out clean (35-45 minutes)


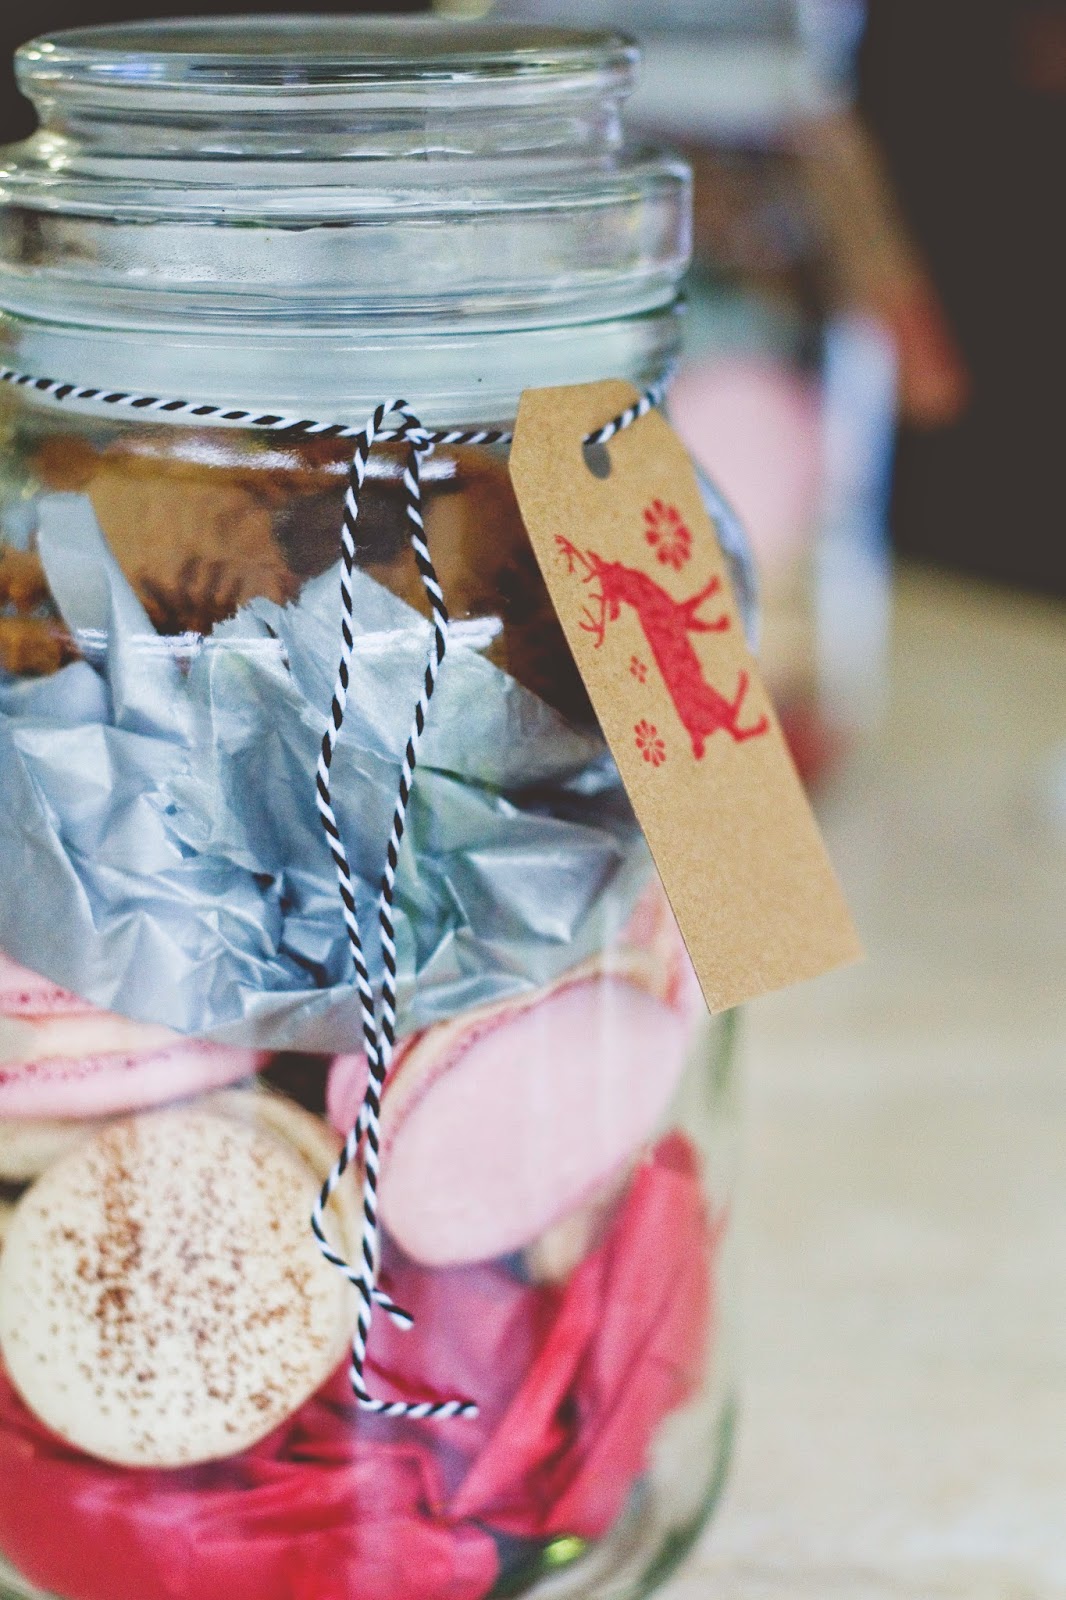
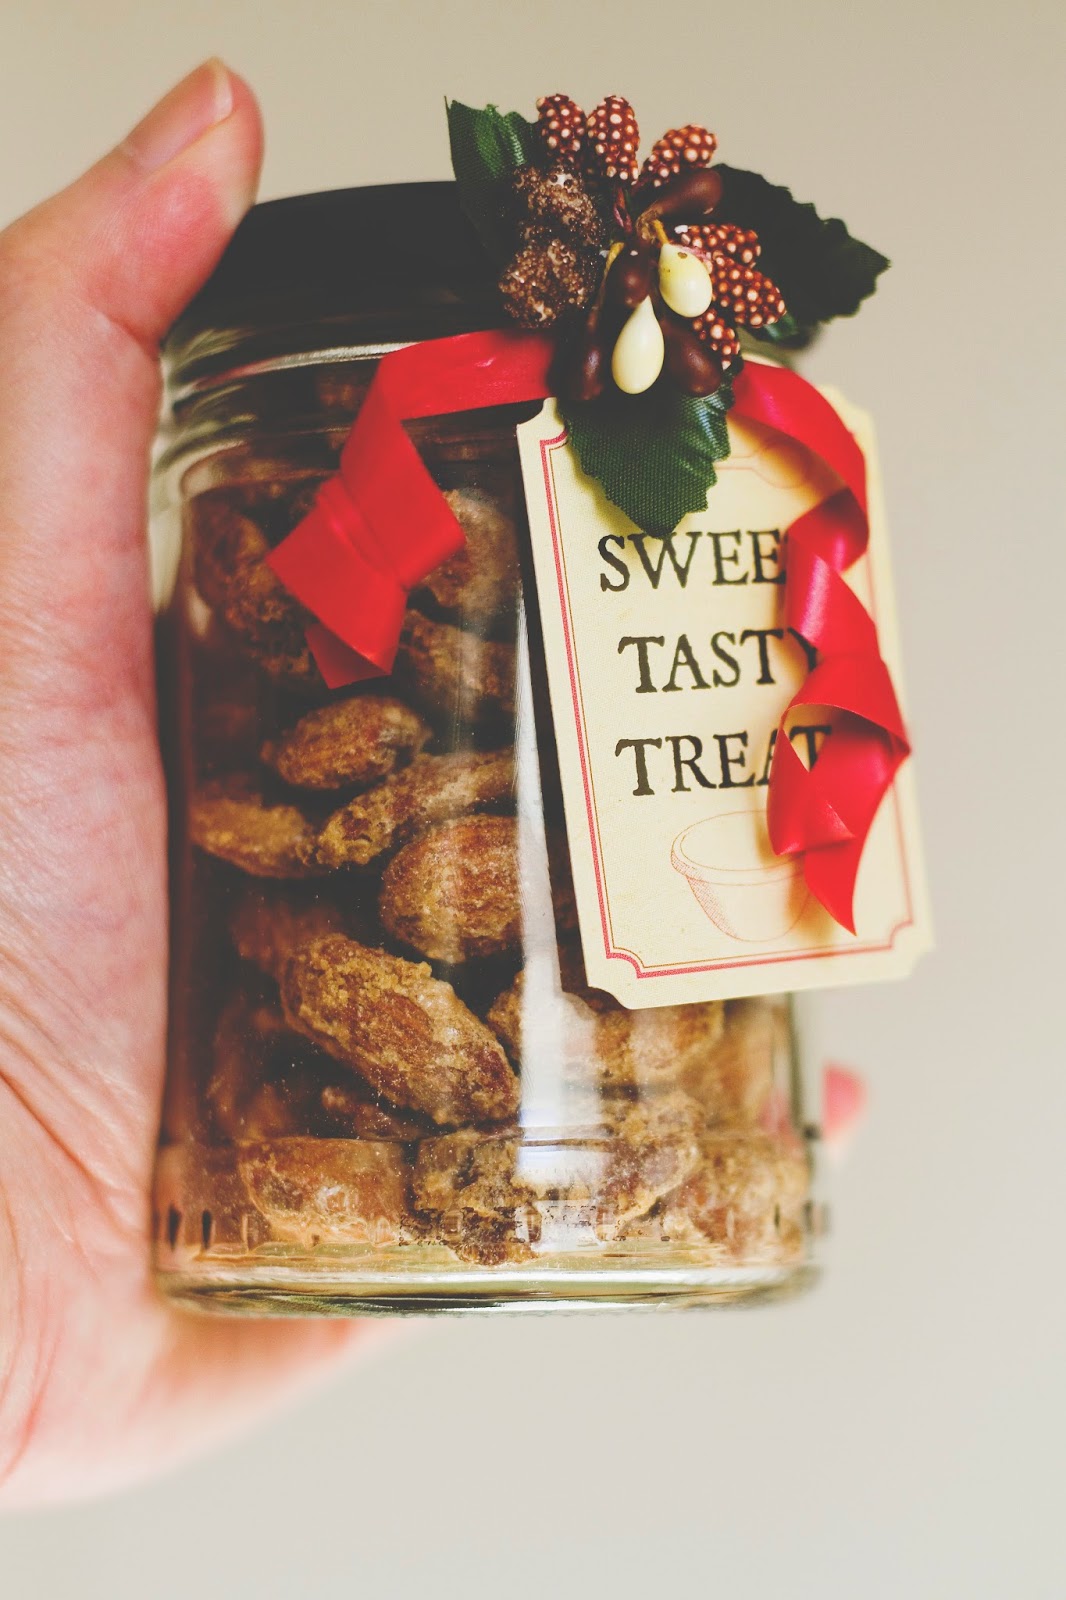
Here are the gifts from my #foodiesecretsanta's!

Cinnamon Spiced Candied Nuts by LC Tan from P.S. I Love to Cook

Holiday Mixed Spice and Orange Spice Macadamias by JJ of 84th and 3rd

Spiced Apple Sauce by Taryn of The Wooden Spoons


Monday, December 15, 2014

Beer Can Chicken

I just had to tick this off my culinary bucketlist. The idea seems so hipster and "cool" that I had to try it for myself. Roast chicken drippings, stewing together with yeasty beer - bubbling away to create something that would surely be magical and delicious.

Beards, tattoos and fedora hats aside, I didn't feel any smack in the mouth POW moment; no glorious revelation. This recipe to me did not feel like the roast chicken revolution I was expecting. Don't get me wrong - it was really delicious, but I wouldn't have been able to tell a beer can chicken from a regular one.

Did I do something wrong? The wrong beer? Try it for yourself and you be the judge.

BEER CAN CHICKEN
Empty out half a large can of beer (husbands are good for this purpose).
Squeeze the juice of 2 lemons all over your chicken and inside the cavity.
Season with salt, pepper and other herbs of your choice - I used rosemary.

It's good to have a second pair of hands to help with the next part.
Place the half-empty beer can in the centre of a baking tray and carefully pull the chicken over the can.
WARNING: Do not perform last procedure with someone who will make it *awkward*

Bake at 175 Celcius for 1-1.5 hours depending on the chicken size.
The chook is ready when the juices run clear from the thigh when stabbed.

Tuesday, December 09, 2014

Tennis Court Cake

So this post is more an Ikea style instruction leaflet than a recipe. For my father's birthday I decided to make a cake that would be close to his heart - tennis themed. Before I was born he was already passionate about tennis - playing it, watching it, living it. Our pets were often named after tennis players - Steffi, Andre...

So to start, I made a chocolate cake which you will find the recipe for here. Remember to take it out of the oven as soon as that skewer is clean! Any longer and you'll have a dry cake.

I also made a basic meringue buttercream - exactly like my chocolate buttercream that you can find here, but without the addition of chocolate at the end. I found that because it was hot, my buttercream just wasn't thickening. To fix this, place the mixing bowl in the fridge for half an hour then take out and mix again. Keep refrigerating and mixing until it's thickened nicely.

So to get to the assembly. Even before I made the cake and the icing, I got the fiddly bits over and done with. I first made a mini banner to serve as the "tennis net" in the middle of the "court". All you need is candles, baker's twine and some scrap paper.

Now the part that did my head in - working with fondant to make a racquet and ball. I'll be honest, I've worked with fondant less than 5 times in my life. But I can never seem to figure out how professionals get their figurines and things so smooth and lump free.
I let them dry a bit to stiffen up so that I could transport them to a plastic container to keep until I needed them.

To assemble the cake, I sawed my rectangular cake in half and dolloped 1/3 of the buttercream to sandwich the layers. I added about half of a small bottle of lime green gel food colouring to the remaining buttercream and beat it in. The difficult part was spreading the buttercream onto the cake so that it would be smooth and even. I'm learning though (I think).

Finally for the finishing touches - rolled out some white fondant "base lines" for the court then everything else just gets placed on top. And now for some pictures of my amateur cake fail...

Teddy, I said you can't have any

Thursday, November 27, 2014

Choc-Coconut Cupcakes

This should appeal to many people. The coconut isn't so full on like drinking from the reef tan oil bottle, but it's there enough to please lovers of coconut. Not quite a bounty bar or Raffaello, but more on par with the humble Lamington - with more chocolatey goodness.


WARNING: Not suitable for messy children (or a lady-child like me) if you desire a clean floor and furniture! These babies are crumbly to the max!


CHOC-COCONUT CUPCAKES
Beat together 1/2 block butter and 1 cup caster sugar.
Add 2 eggs and 1 teaspoon of coconut essence.
In a separate bowl, combine 1 and 1/4 cups self-raising flour, 1/4 cup cocoa and 1 cup dessicated coconut.
Alternate the addition of the flour mixture with approximately 1 cup of cream.
Gradually add the cream until you get the consistency of chocolate mousse. 
You may not need all the cream.
It's not worth licking the batter - it's got that bitter baking powder taste. Believe me, I tried it.
Bake at 160 C for about 20 minutes.
Once cool, get to work on the easy-peasy icing!

Beat together 1/2 block soft butter with 1 cup of icing sugar and 2 tablespoons cocoa.
Spread your cupcakes with the icing and finish with a sprinkling of coconut.
Be prepared for the delicious crumbly mess! Having a small animal underneath you helps too.

Tuesday, November 11, 2014

My Halloween Gaieties - Part 2

This was a smart idea! Have your Halloween party after Halloween is over - when candy and costumes are on sale!

I don't own much in the way of costumes so built an outfit based on things I already had. There was one thing I needed but couldn't find - yellow socks. So I got these instead:
Yes, I came as Dora the Explorer! I already had a monkey (but unfortunately not grey with red boots) and a backpack (not a talking one). I drew my own little "map" too.
The socks fit me perfectly well!
The rest of the costumes on the night put mine to shame! There was a technicolour plethora of body paint and wigs, children's games, and of course, food (my contribution being some mini red velvet cupcakes).